Hello and welcome to my inaugural blog for this year’s Azure Spring clean event focused on getting started with Entra ID security capability for securing user identity.
Entra ID provides multiple tools to help protect your users and environments.
This blog will focus on providing some insights and recommendations when configuring security for your users and services.
We will look to cover the following topics in the blog,
- Multi Factor Authentication (MFA)
- Conditional Access
- Break Glass Account
- Self Service Password Reset (SSPR)
- Privileged Identity Management (PIM)
- Access Reviews
Azure has multiple portals for accessing the various capabilities it provides. We will mainly focus on using the entra.microosft.com portal. We will occasionally dip into portal.azure.com for some specific configurations.
Multi Factor Authentication (MFA)
MFA is a security mechanism that adds an additional step to your user’s authentication journey (2 step verification\authentication).
For a user to authenticate and be granted access to your organization they need to provide,
- Username
- Password
Something the user knows,
- MFA challenge
Something the user has. This can be a notification to an authenticator application on your phone or a FIDO2 key as an example.
To configure MFA for all your users in Azure navigate to,
- Navigate to portal.azure.com
- Entra ID > Security

- Select Multi Factor Authentication

- Select configure

Follow the prompts to enable MFA for one or multiple users.
There are guided tutorial links that will help you if you are new to Azure.
A better way to enable Multi Factor Authentication is to use conditional Access Policies.
Now, you maybe wondering, what are conditional access policies?
Conditional Access
Conditional access in Azure is a set of rules (conditions) when met grant users access to your organization. If they are not met the user is denied access. These conditions can include various factors such as user identity, location, device state, session risk etc.
By defining conditional access policies, your organization can enforce additional security measures beyond username and password authentication, enhancing your overall security posture.
In the following example we will enable MFA using a conditional access policy,

- Under Identity > Protection select conditional access

- From the overview page select > create new policy

- Give the policy a name and select the users you want to target,

In my example I am targeting all users. If enabled, this policy would disable access for all users unless they are using MFA.
You might have also noticed by default the policy is report-only mode which would give you a log of what would happen if the policy was enabled.
To view the out from report-only mode navigate to Conditional Access > Insights and reporting,
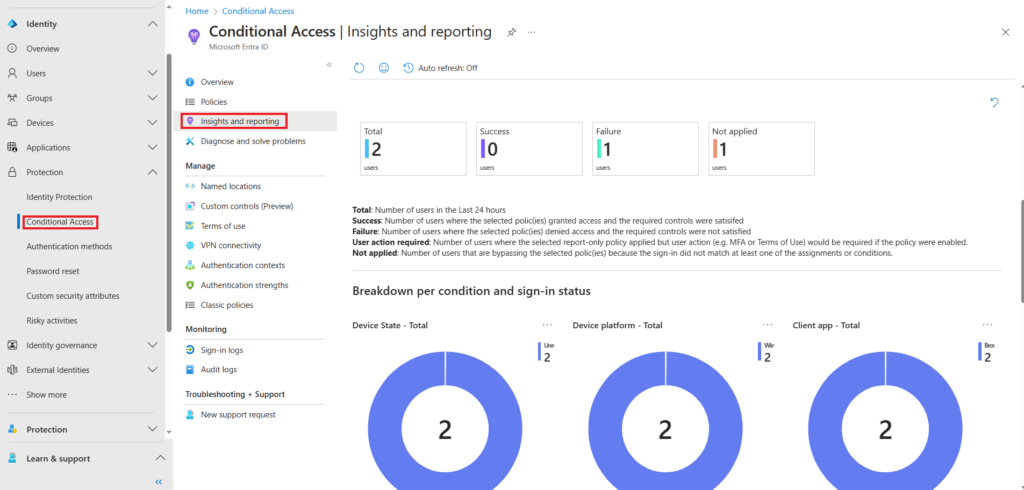
We will exclude the global administrators from this policy. As the yellow warning indicates, do not lock your self out of the portal.
Select exclude and from the directory roles checkbox exclude global administrators

- Select Grant > and enable require authentication strength

The require authentication strength provides you with multiple options that you can enable for MFA
- Multifactor authentication
- Including SMS texts
- Passwordless MFA
- Authenticator App
- Phishing -resistant MFA
- FIDO2 security key
Enable the one appropriate for your environment and select create.
We have now enabled MFA for all users except Global Administrators in our test environment.
To learn more about conditional access refer to the Microsoft documentation
Building a Conditional Access policy – Microsoft Entra ID | Microsoft Learn
What you would want to do is enable MFA for all users and create some break glass accounts in case emergency access to your environment was required
Break Glass Account
A break glass account or emergency access account is a privileged account configured with elevated privileges for emergency access into your environment.
Access to this account should be controlled and only used in circumstances when access through normal privileged accounts cannot be achieved, e.g.
- The MFA service us not available but enabled for all users
- Unforeseen circumstances, natural disasters
Key considerations you should keep in mind when configuring your break glass account,
- Limited Access: The break glass account should have limited access to only the necessary Azure resources and permissions required to perform critical tasks. This helps minimize the potential impact of unauthorized access.
- Strong Authentication: Use a complex password for your break glass accounts. The maximum password length can be 128 characters. Consider using MFA if appropriate. There is an argument not using MFA for Break Glass Accounts.
- Exclude from Conditional Access: Your break glass accounts should be excluded from any conditional access policies that restrict access.
- Monitoring and Logging: Enable logging and monitoring for the break glass account to track access and activities. This helps ensure accountability and provides visibility into any suspicious or unauthorized behaviour.
- Regular Review and Rotation: Periodically review and rotate credentials for the break glass account to minimize the risk of compromise. This includes updating passwords, certificates, or other authentication credentials as needed.
- Documentation and Procedures: Document clear procedures and guidelines for accessing and using the break glass account. Ensure that authorized personnel are trained on how to properly use the account in emergency situations.
For additional information and best practices refer to the Microsoft document,
Manage emergency access admin accounts – Microsoft Entra ID | Microsoft Learn
Self Service Password Reset (SSPR)
As the heading suggests, SSPR gives the users the ability to reset their own password. There are several security benefits to consider when you are looking to enable SSPR,
- SSPR provides a one-time user registration process where users set up their authentication methods, ensuring only authorised users can reset their password,
- Mobile app notification
- Mobile app code
- Mobile phone
- Security questions
It is recommended at least 2 options are configured
- Regaining access to their accounts through enhanced security,
- User will be challenged for one of the authentication methods configured during the registration process.
- The ability for users to reset their own passwords reduces the volume of traffic to your support personnel, freeing them up focus on more critical task..
- Faster reset process ensure users can get back required access faster than traditional methods. This also enhances productivity.
For further reading review the Microsoft Entra self-service password reset guide.
Privileged Identity Management (PIM)
Privileged Identity Management (PIM) is a powerful framework, helping organisations manage, control and secure privileged access to critical resources within your Azure environments.
PIM provides time-based, requestor/approver role activation, reducing risk associated with excessive, unnecessary, or misused access permissions. It covers resources in Microsoft Azure, Microsoft 365, Microsoft Intune
PIM provides the following key capabilities,
- Just-in-Time Access: Activate privileged roles only when needed.
- Time-Bound Access: Set start and end dates for role activation.
- Approval Workflow: Require approval before activating privileged roles.
- Multifactor Authentication (MFA): Enforce MFA for role activation.
- Conditional Access Policies (Public preview): Further control role activation.
- Justification: Required to be provided by users when requesting role activation
- Access Reviews: Regularly review and validate role assignments.
- Audit History: Full audits history of all role activations.
PIM can be used to manage,
- Microsoft Entra roles
- Groups
- Azure resources
To configure PIM navigate to entra.microsoft.com > Identity governance > Privileged Identity Management,
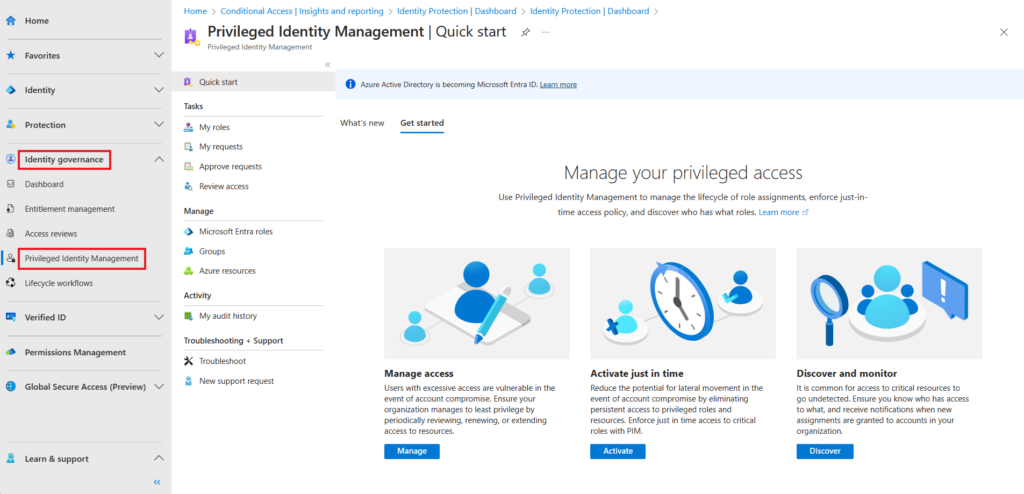
To configure and assig a role select Microsoft Entra roles and under manage select roles. You will see a list of all Entra ID roles you can configure assignments for or select add assignment.
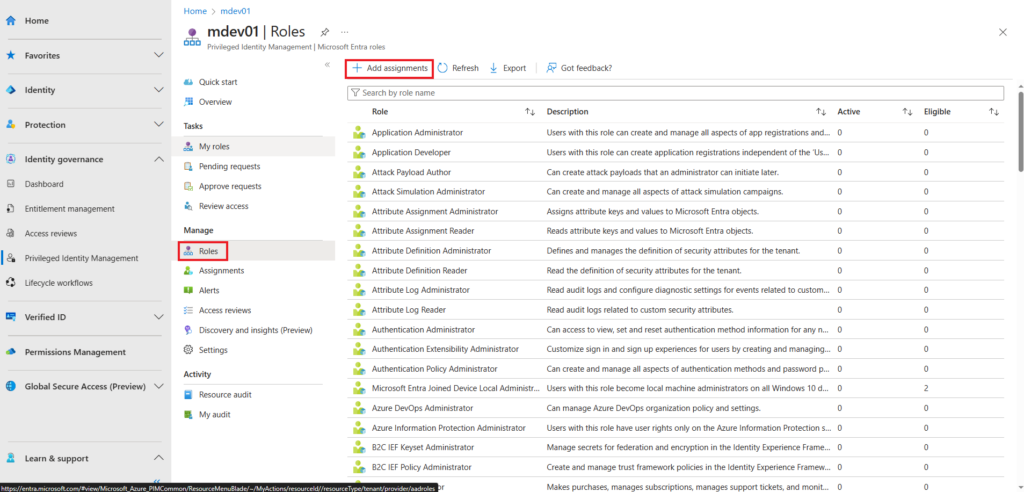
In our example we will look at the Application Administrator role by clicking on the Application Administrator role
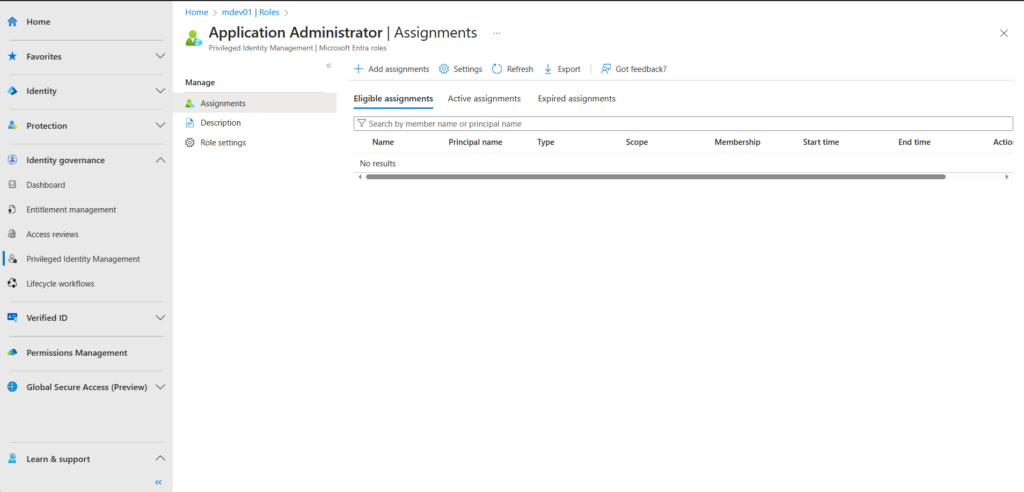
When selecting the role you will have 3 options,
- Assignments
- See active/eligible or expired assignments
- Description
- See a description of the roles
- Role settings
- Configure settings for the role
The below image provides a snapshot of some of the default settings that are configured,
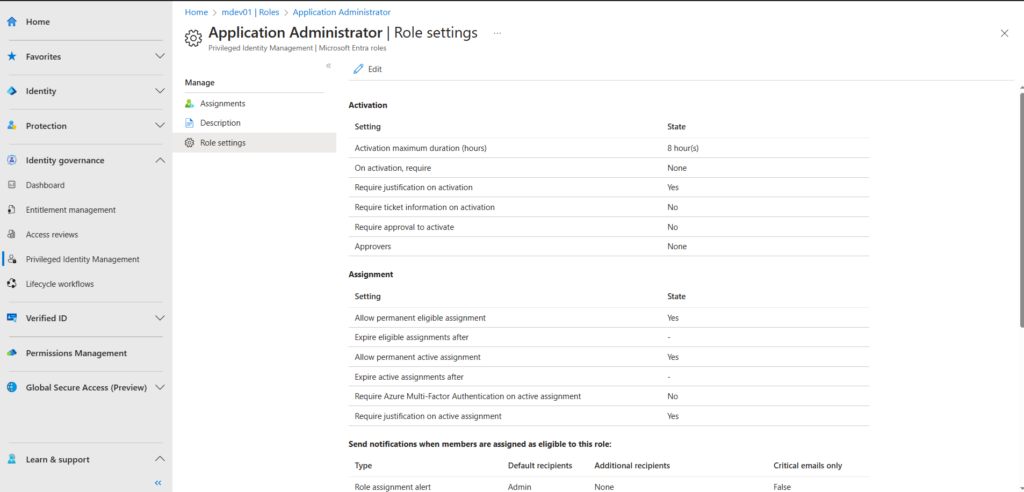
Configuring PIM reduces your attack surface by activating privileged roles only when necessary for a defined time period. All role activations can be subject to an approval process.
The process is fully logged proving a complete audit history to meet your compliance requirements.
Access Reviews
Access reviews is a mechanism that allows for continued validation of user roles assignment by regularly reviewing access assignments and permissions. This has several security benefits for your organisations,
- Improved Security Posture: Review and revoke unnecessary privileges, reducing the risk of unauthorised access
- Regulatory Compliance: GDPR and other defined regulations require regular review and validation or user acccess.
- Proactive Risk Management: Proactively identify and mitigate security risks associated with privileged access.
- Revoke permission from users who no longer require privileged access
- Review users access and assign appropriate levels of permission is user has changed roles and now requires a lower level of access
To configure Access review navigate to entra.microsoft.com > Identity governance > Access reviews and create a new access review,
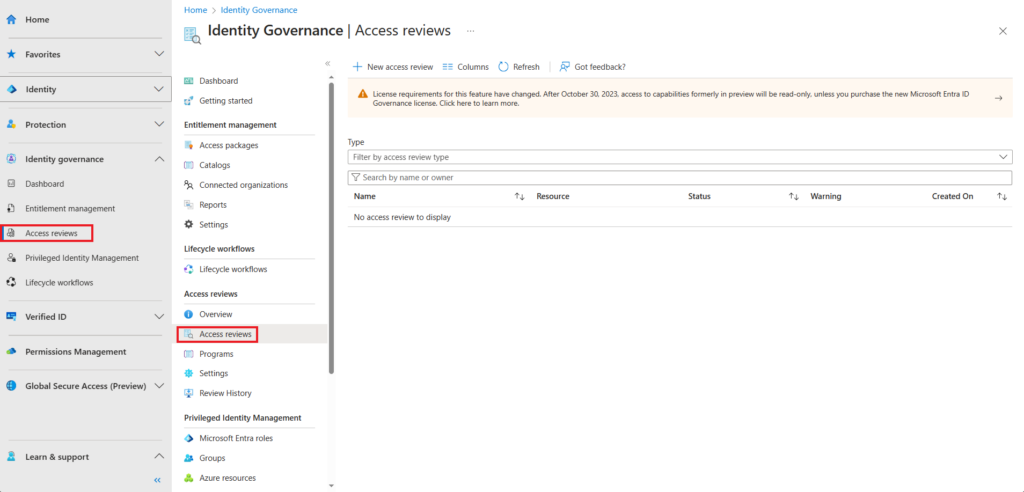
Access reviews can be reviewed by,
- Group owners
- Selected users
- user review their own access
And can be configured to reoccur on a regular basis, monthly, quarterly etc
Under the settings section you have the option to configure what will happen if the access review request is not actioned,
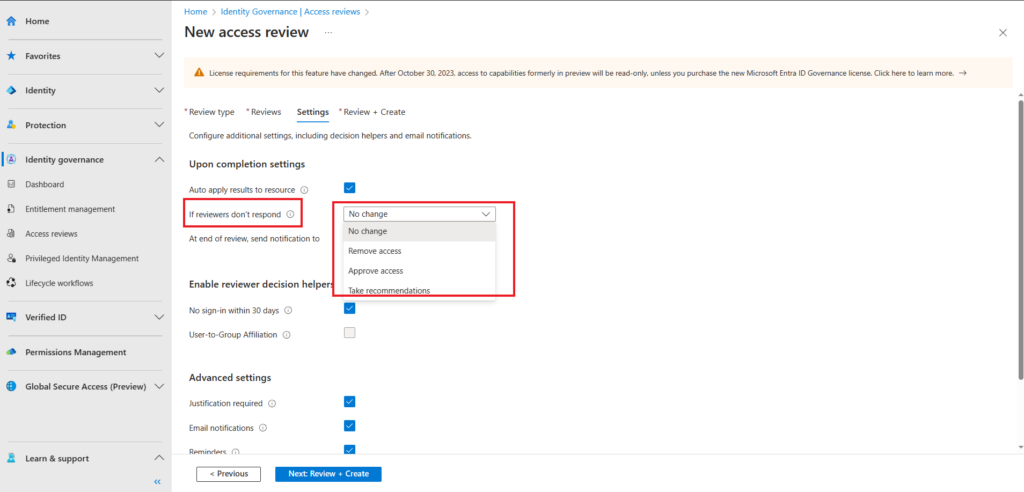
As you can see one of the options is to remove access if the review is not actioned, resulting in the users privileged access being revoked.
For further information review the Microsoft documentation
What are access reviews? – Microsoft Entra – Microsoft Entra ID Governance | Microsoft Learn
I have also included the link for Entra ID Governance licensing fundamentals below. The table in the middle of the article details the different licenses required for Access review capability.
I hope you enjoyed this post and found it helpful. Thank you for reading.
