The previous blog post provided a quick overview of Defender for Cloud and some of its capabilities.
This blog post will look at setting up a dedicated Log Analytics Workspace for Defender for Cloud
Log Analytics Workspace
Defender for Cloud collects data using the Log Analytics Agent. The data is used to monitor for security vulnerabilities and make recommendations.
The first 500MB of data ingested is free. As Microsoft pricing may change over time, please refer to the latest guidance from Microsoft on pricing. Defender for Cloud pricing can be found here.
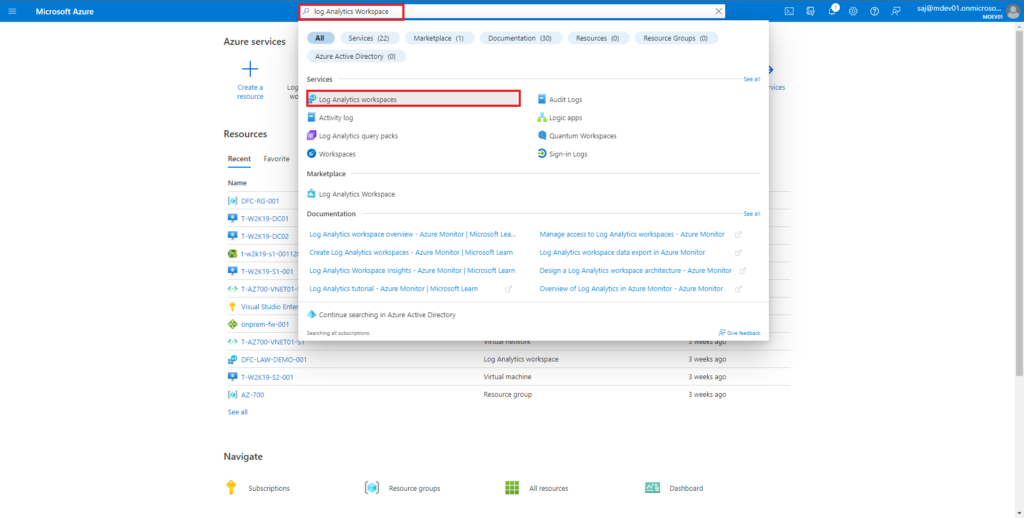
To create a dedicated Log Analytics Workspace search for “Log Analytics Workspace” from the Azure portal (portal.azure.com) home page and select Log Analytics Workspace,
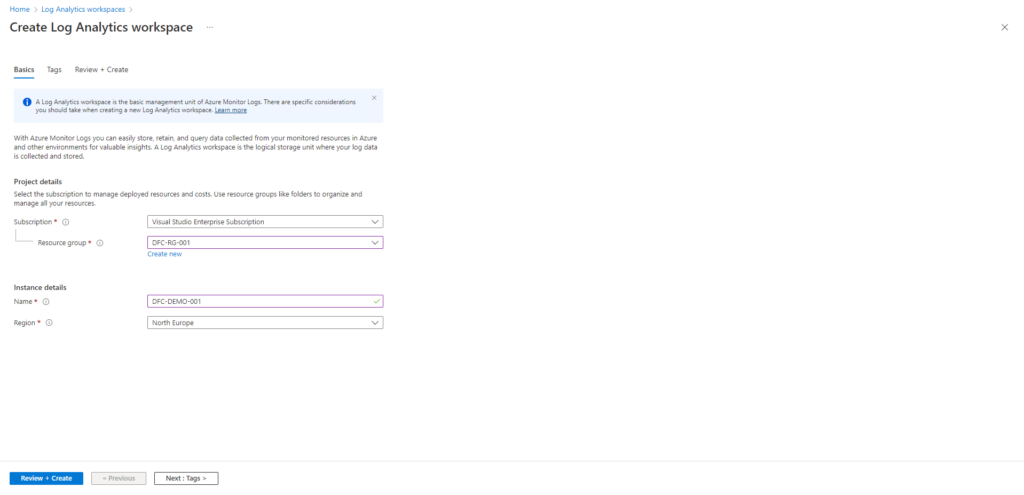
Select create to be presented with the “create new” Log Analytics Workspace creation page. You will need to provide the following information,
- Subscription
- Resource group name (create new option is also presented)
- Name of Log Analytics Workspace
- Region
If you are using tags in your environment, tags can be configured on the next page.
When you are ready review and create.
Defender for Cloud – Configure custom Log Analytics Workspace
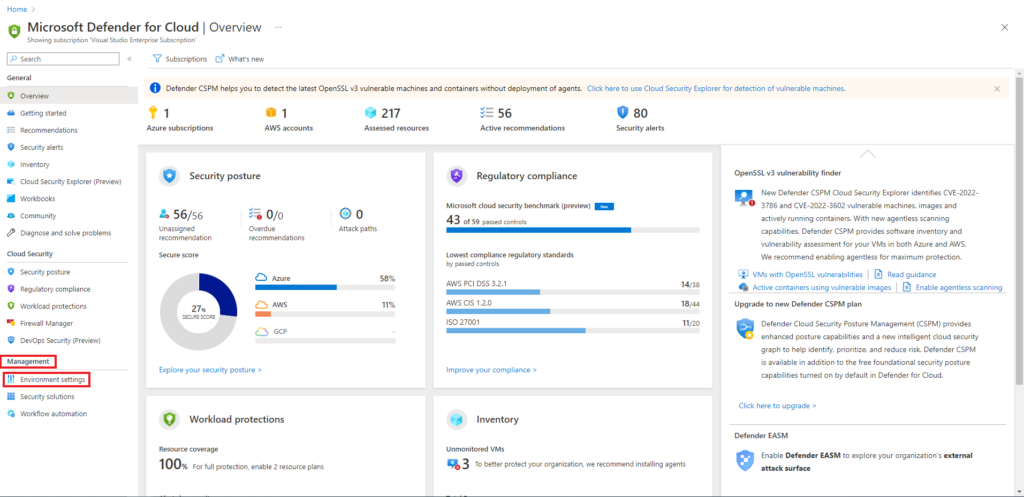
To configure Defender for Cloud to use your newly created Log Analytics Workspace navigate to Defender for Cloud from the Azure portal, under Management select settings,
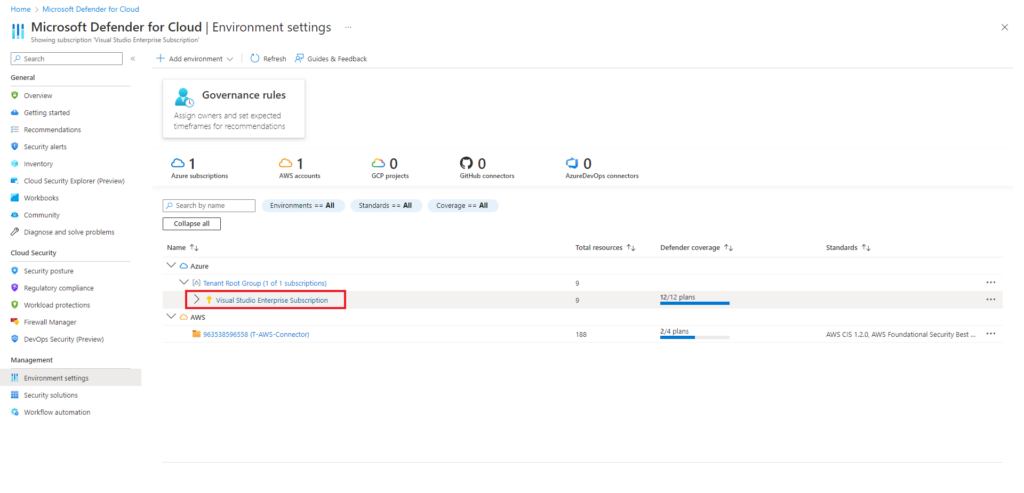
From your configured environments expand Azure and select your subscription,
Select your Azure subscription. From the settings page, Defender plans select Settings and monitoring,
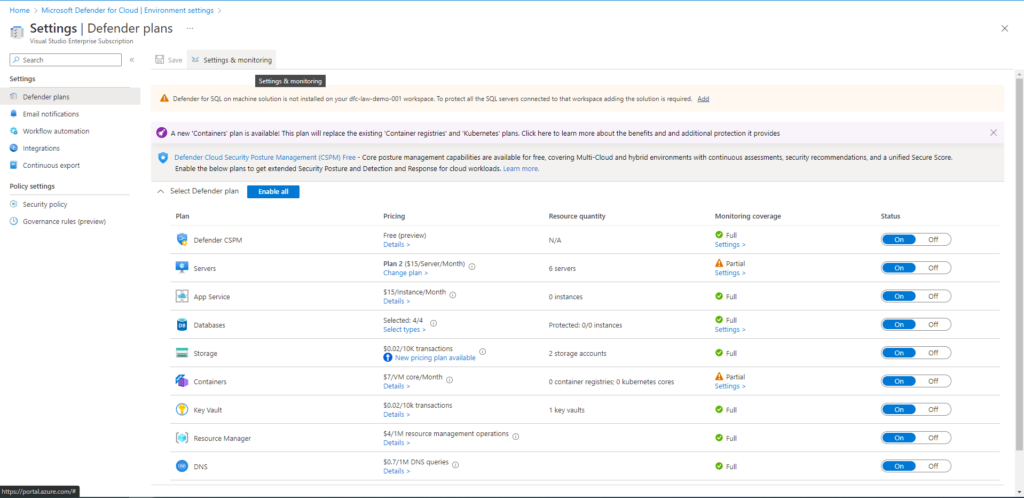
The settings and monitoring page will show you,
- Configured agent type
- Selected workspace
- Security events – data that is being collected
- option to edit settings
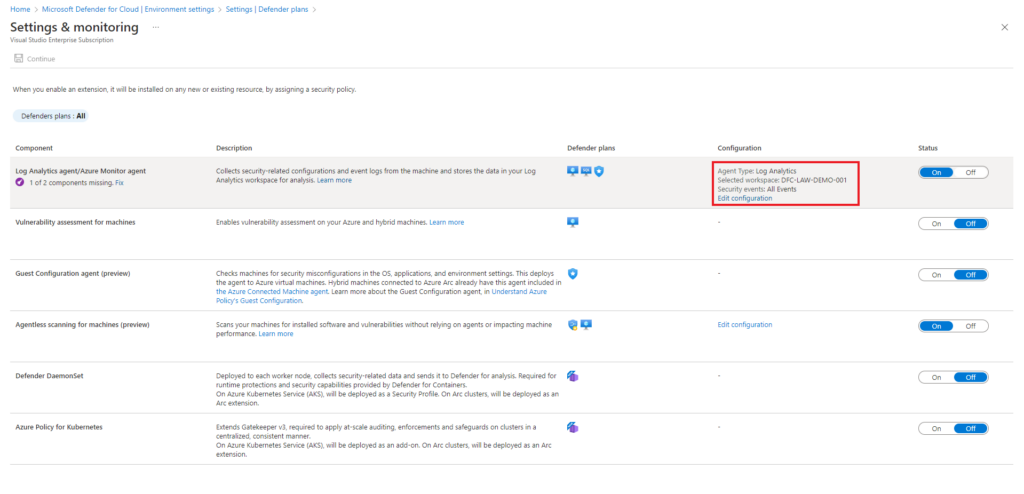
In this example I am using the Log Analytics Agent to collect security related configuration and event log data. You have the option to use the Azure Monitor Agent, but this is still in preview at the time of writing this.
My demo environment has been configured to use DFC-LAW-DEMO-001 and the custom workspace.
Under security events storage all events are being collected.

When you have finished customising select apply.
In the next blog post of this series, we will look at on-boarding an AWS environment.
